This article discusses Azure Active Directory, Microsoft’s identity platform which supports various authentication flows. Setting up the OAuth Client Credentials authentication flow can be done directly from the Azure AD interfaces. Not a single line of code is required for this setup. In this post, I share the minimal configuration necessary to implement this type of access management.
My goal is not to detail the Client Credentials grant type, but rather to show how to configure it on Azure AD. In fact, you’ll find countless diagrams and explanations on the Internet about how this flow works (for example, https://auth0.com/docs/get-started/authentication-and-authorization-flow/client-credentials-flow). However, I’ll just mention that this flow is indispensable when it comes to managing access permissions between machines (machine-to-machine). Therefore, this authorization mechanism should be considered only when there are no users to authenticate. For instance, when an application wants to access an API under its application identity, this flow makes complete sense.
To illustrate how to proceed on Azure AD, I propose the following example:
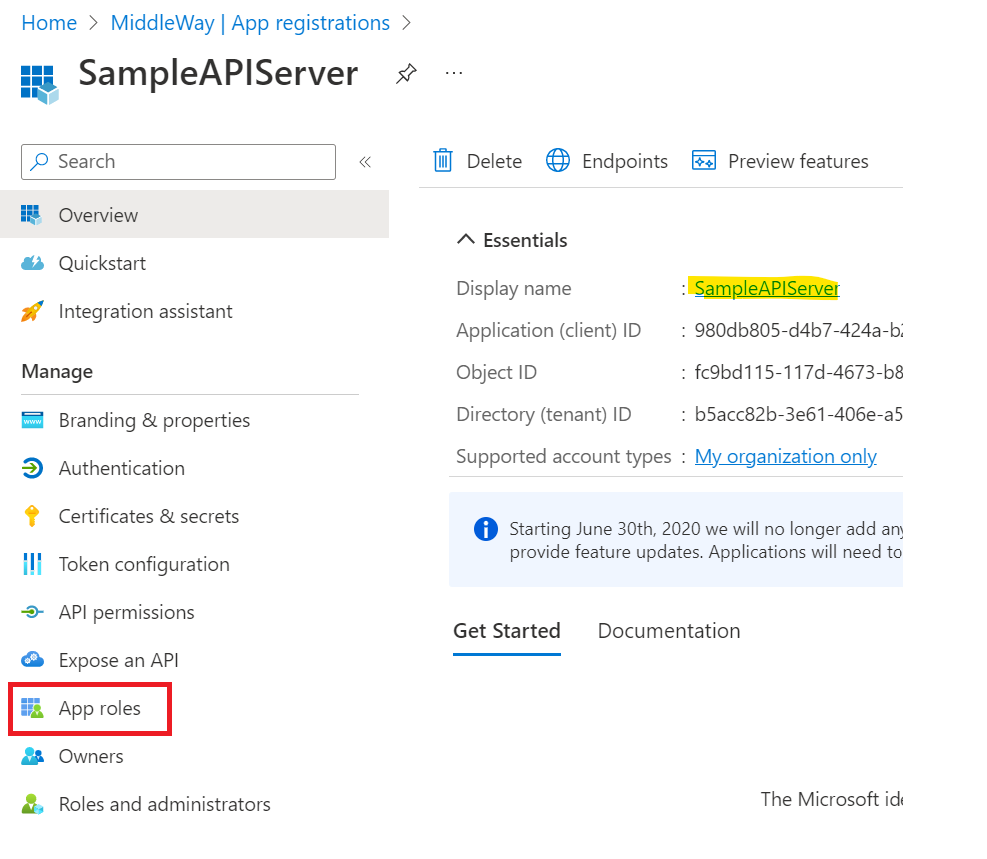
Personally, I’ve added two App Registrations to my Azure Active Directory: the first one to manage my server’s (API) identity, and the second one for my client’s (application) identity.

For this example, I set up two mono-tenant App Registrations, but the operation also works with multi-tenant App Registrations.
First, we will configure the Server App Registration (SampleAPIServer). I will simply need to specify the roles that can be assigned to an application. Under Azure AD, the roles of an App Registration are called “App Roles”. To configure these App Roles via the interfaces, it is necessary to go to the homepage of the App Registration and click on the “App roles” tab.
On the following screen, I configure the list of roles offered by my App Registration. Personally, I often take inspiration from the organization and conventions of the Graph REST API to structure my own APIs. I’ll do the same in this example by defining three roles.
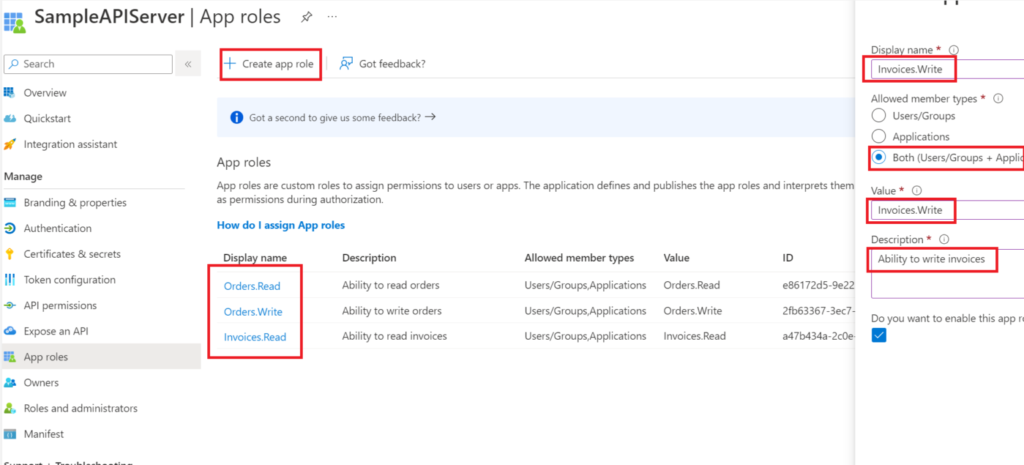
To create an App Role, use the “Create app role” command. A panel appears on the right side of your screen. In this panel, it is necessary to fill in a label. Then, I choose the type of member allowed to use this role. To set up application permissions, it is minimally necessary to choose the “Applications” type. In the screenshot above, I select “Both”, which includes users and applications. My role can therefore be assigned to a user and/or an application.
Then assign a value to this role. This value is the one that will be transmitted in the JWT token. It is not mandatory for the label to be equal to the value. Finally, provide a description of the role to validate the insertion.
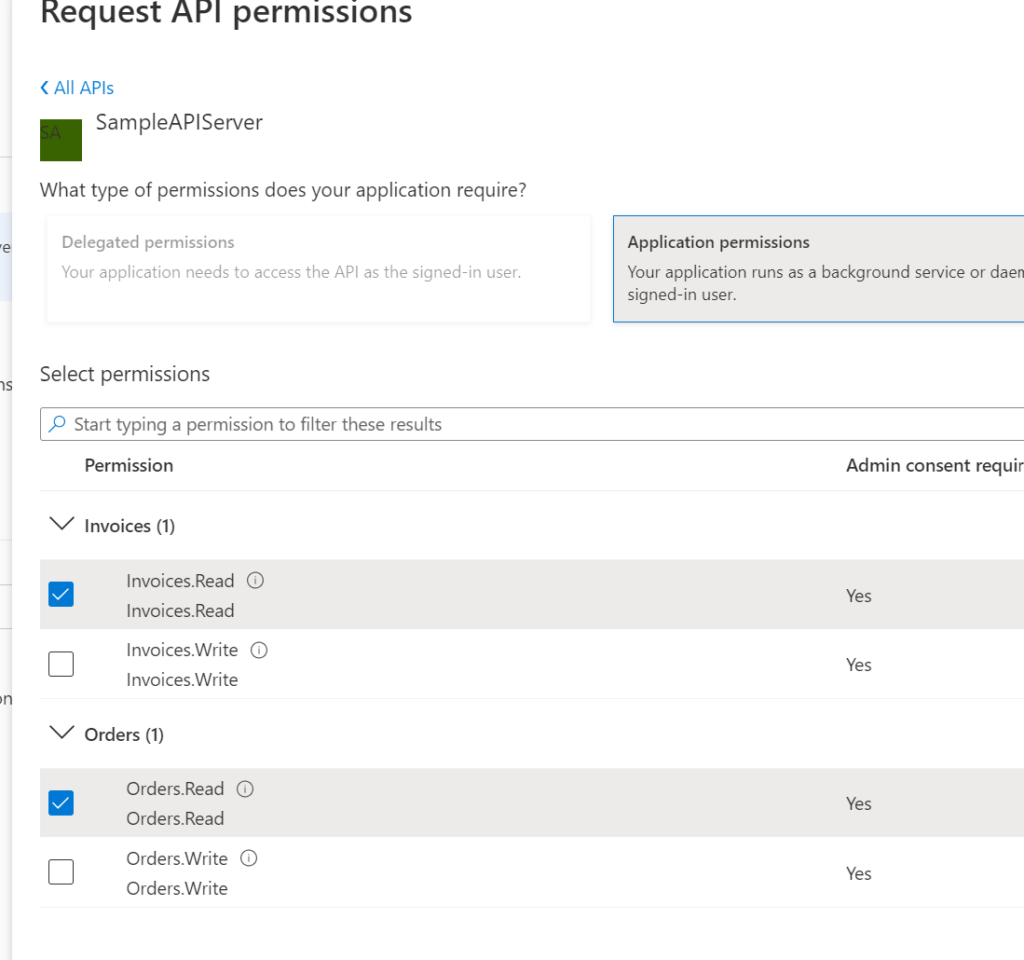
In a first step, we configured the App Roles proposed by our server. Now, we need to assign the permissions we wish to grant to our client. This time, it is necessary to use the “API permissions” tab at the level of the Client App Registration (SampleAPIClient) management screen. Via this screen, use the “Add a permission” command to associate a role with your client application.

After clicking on “Add a permission”, a panel appears on the right. Find your Server App Registration through this panel. If you added this yourself, you will have quick access via the “My APIs” tab. Once the Server App Registration is chosen, you need to select the type of permission to grant. In our case (Client Credentials), it is necessary to choose “Application permissions”. On this screen, you must choose the permissions that you grant to your client. For my example, I will take the 2 read rights that we have defined above.
After validating the assignment of permissions, a “warning” type icon will indicate that despite the assignment of permissions to the client, the roles are not yet granted. Indeed, since it is a machine-to-machine flow, there will be no user intervention at the time of authentication. It is necessary for an administrator to give his consent for the assignment of these rights from these interfaces.
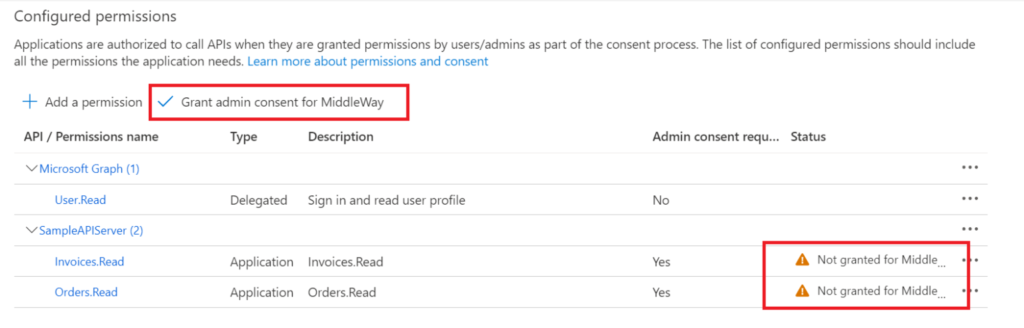
To give your consent, use the command “Grant admin consent for <your tenant>” as shown in the screenshot above.
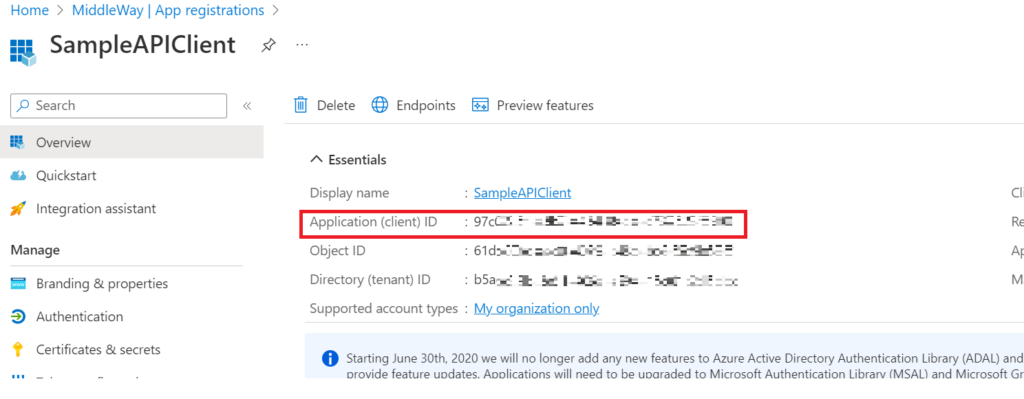
To comply with the OAuth Client Credentials standard, the Client App Registration must provide an ID and a client secret to obtain a JWT token. The client ID is retrieved via the “Overview” screen at the Client App Registration level.
The client’s secret can be created from the “Certificates & secrets” tab by clicking on the command “New client secret”. Be sure to copy-paste this secret as it will only be available once on your screen. Also note that the secret must have an expiration date to guarantee a rotation of it. By default, Microsoft recommends an expiration of 6 months. It is essential to define reasonable lifetimes to maintain a high level of security. You will therefore have to manage the expiration of these secrets.
When you request a token, you must provide the scope for which you are requesting it. This scope generally represents the item on which you are requesting your authorizations. So, as a client, if you want to get a token on the SampleAPIServer application, you must provide the scope corresponding to the SampleAPIServer application. By default, if you have not defined an application ID URI, you must use a value that is the concatenation of your application identifier with “/.default”. You will therefore have a result in the form of “<Guid>/.default”.
Again, the Microsoft identity platform respects the OAuth standard by offering standardized endpoints. To obtain a JWT token, you simply need to make a POST request in accordance with the OAuth standard. Below is an example:
POST /<tenant-id>/oauth2/v2.0/token HTTP/1.1
Host: login.microsoftonline.com
Content-Type: application/x-www-form-urlencoded
Content-Length: 179

grant_type=client_credentials&client_id=<client-id>&client_secret=<client-secret>&scope=<scope>
To perform this request, you must provide, on the one hand, the scope, the client ID and the secret, and on the other hand, you must push this request (HTTP POST) on your tenant. You will therefore need your tenant’s identifier.
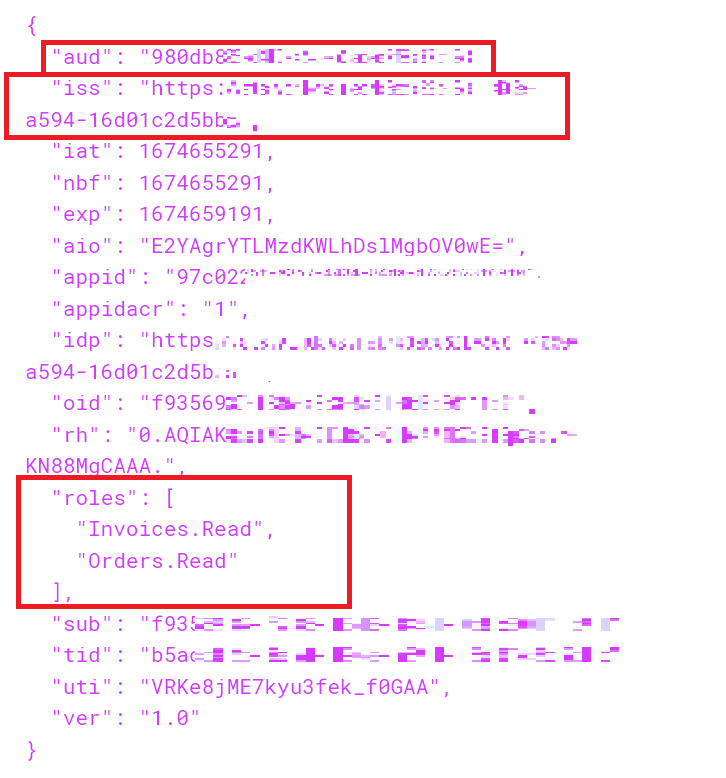
If I test my scenario, I find elements like the issuer (token issuer), the audience (the ID of the target App Registration) and the roles assigned to me.