In this article, we will see how to use variables in BizTalk bindings during automatic deployments using Azure DevOps. We will also see how to have different configurations depending on the destination environment, and how to make it automatic. Lastly, we will end with a tip on managing slightly more complex bindings.
The first step is to set up our BizTalk Server Application Project as explained in the following article: BizTalk Server Application Project : mise en place.
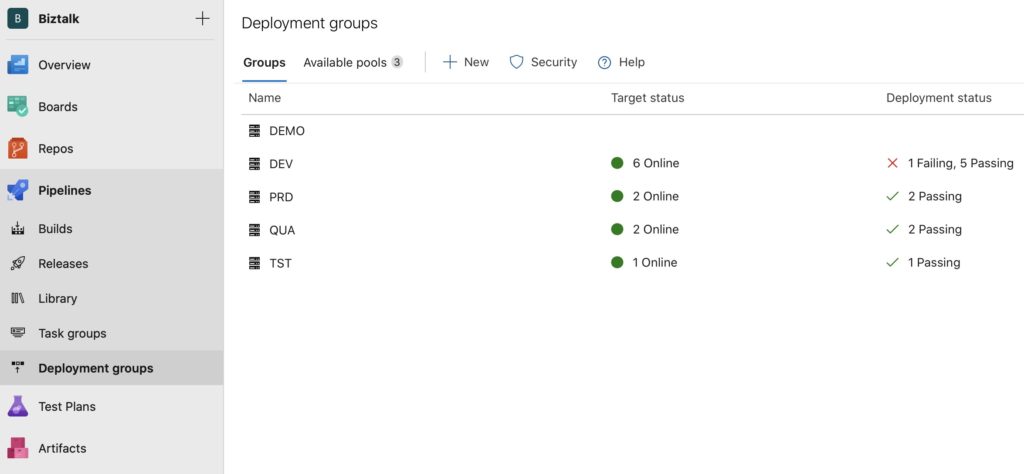
Next, one benefit of using variables in bindings is also the ability to do so depending on the deployment environment. Accordingly we must first, in Azure DevOps, create these different environments in Deployment groups, as shown in the example below:

In the bindings file in Visual Studio (in our example, the Bindings.xml file), this means adding variables to all the desired fields in the following way:
<SendPort Name="SndP_IAM_Employee" IsStatic="true" IsTwoWay="false" BindingOption="0" AnalyticsEnabled="false">
...
<PrimaryTransport>
<Address>$(File_Path)\%SourceFileName%</Address>
...
</SendPort>
As can be seen, it is the $(File_Path) variable in the Address field that we are interested in here.
Note that these variables can be anywhere inside an XML tag, such as a receive location, a host instance, the URI of a send port, etc.
Once all the desired fields have been given variables in the bindings files, they need to be created in Azure DevOps. This is done by going to the definition of your release, and selecting the Variables tab.
See the screenshot below:

It can be seen there are as many key/value rows as there are environments. That is the benefit of configuring the various deployment groups beforehand.
If your variable’s value is the same in all environments, select Release as the scope.
And that’s it, it’s that easy! When the deployment is kicked off, the values will be added to the configuration file automatically.
Adding variables to the bindings file can be somewhat laborious the first time you do it, but it is definitely worth doing. There are benefits in terms of flexibility, quality, and so on. It really is a must-have in our CI/CD DevOps approach.
It is often the case that configurations differ radically from one environment to another. There might well be a different adapter, a different pipeline, and so forth.
In this situation, the way of working described previously soon shows its limitations. We therefore use a little workaround based on XML comments. Here’s how it works:
In your bindings file, you can use variables as shown below:
<SendPortCollection>
<SendPort Name="SndP_HUBRH_Employee_BDZ" IsStatic="true" IsTwoWay="false" BindingOption="0" AnalyticsEnabled="false">
...
$(Comment_If_PRD)
<PrimaryTransport>
<Address>$(File_Path)\%SourceFileName%</Address>
<TransportType Name="FILE" Capabilities="11" ConfigurationClsid="5e49e3a6-b4fc-4077-b44c-22f34a242fdb" />
...
</PrimaryTransport>
$(End_Comment_If_PRD)
$(Comment_If_TST)
$(Comment_If_QUA)
<PrimaryTransport>
<Address>$(File_Path)\%SourceFileName%</Address>
<TransportType Name="SFTP" Capabilities="523" ConfigurationClsid="f75aeff5-ebc7-4e7c-a753-fdd68ab45c95" />
...
</PrimaryTransport>
$(End_Comment_If_TST)
$(End_Comment_If_QUA)
...
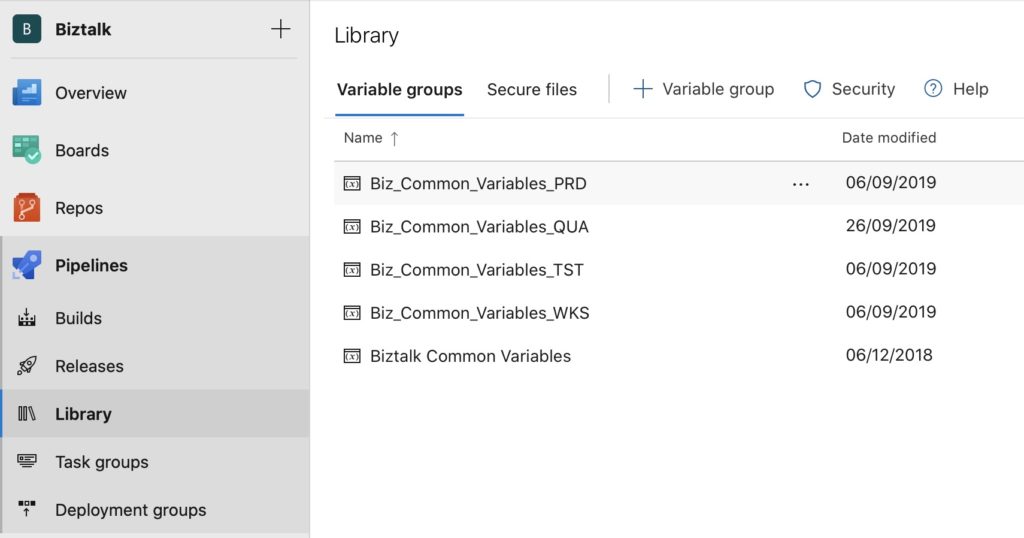
Then, in the Azure DevOps Library tab, configure the following Variable groups:

Each Variable group contains a list of variables. We further recommend using these Variable groups if you have common data items shared across different releases.
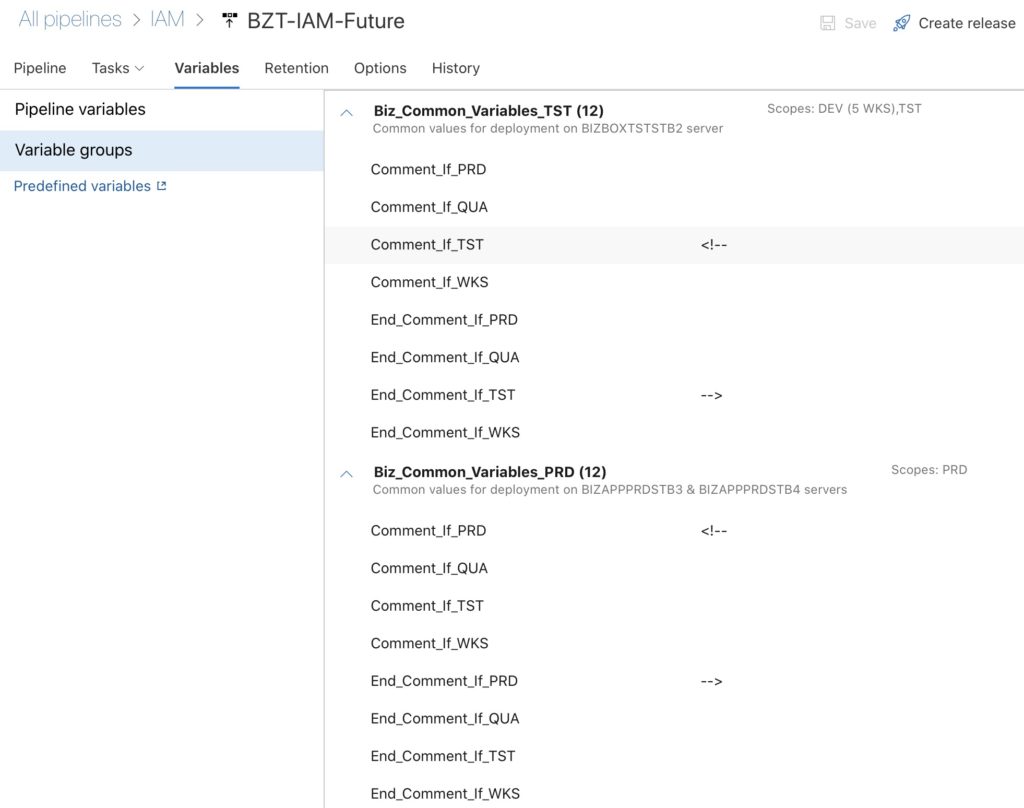
In our example, if we go into the Variable groups tab for our release, we see the following configuration:

And there you are. Simple but effective. Using this tip, XML tags are entered as comments according to the release environment.
This method can be used to manage BizTalk bindings that are very different from one environment to another.