
When deploying Azure resources, tagging often takes a back seat. Tags are forgotten, incomplete, or applied inconsistently across teams, which quickly complicates cost tracking, platform readability, and governance.
The goal of this tutorial is to show how to implement a simple mechanism to automatically apply standardized tags as soon as resources are created, without adding constraints to existing deployments.
To achieve this, we will use an Azure Function, as it allows handling the scalability and complexity often found in integration platforms. However, if the requirement is simple, the best way to address it remains Azure Policies, which can act on resources at creation time (see this tutorial).
Without clear rules, tags quickly lose their usefulness: different names for the same concept, inconsistent values, or missing information depending on deployments. Defining a common baseline ensures that resources remain readable and usable, regardless of the tool or team behind the deployment.
The table below illustrates an example of simple tags that are largely sufficient to get started:
| Tag name | Meaning | Example value |
| application | Application or service carried by the resource | catalog-api |
| environment | Execution environment | dev |
| owner | Team or person responsible for the resource | azure-team |
These tags serve as a common foundation. They can then be enriched or adapted depending on governance constraints or internal use cases. This does not impact the mechanism presented in this tutorial.
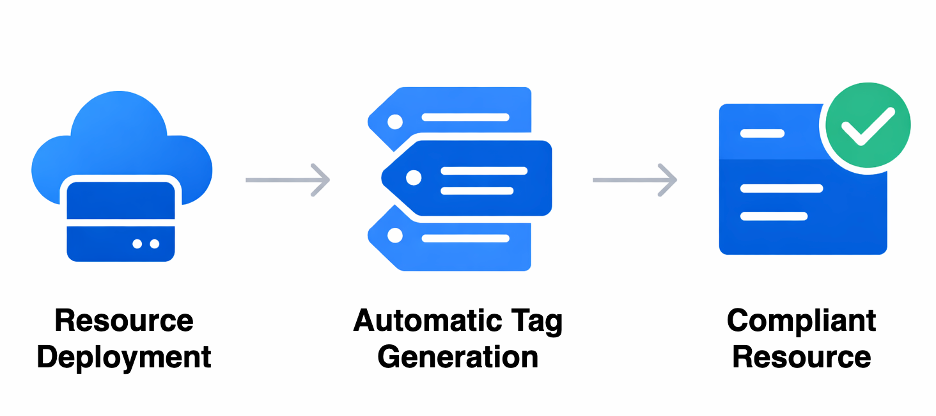
The principle is intentionally simple: tags are automatically computed and applied at deployment time, without depending on team practices or the tools used. Once in place, the mechanism runs transparently and requires no manual action.
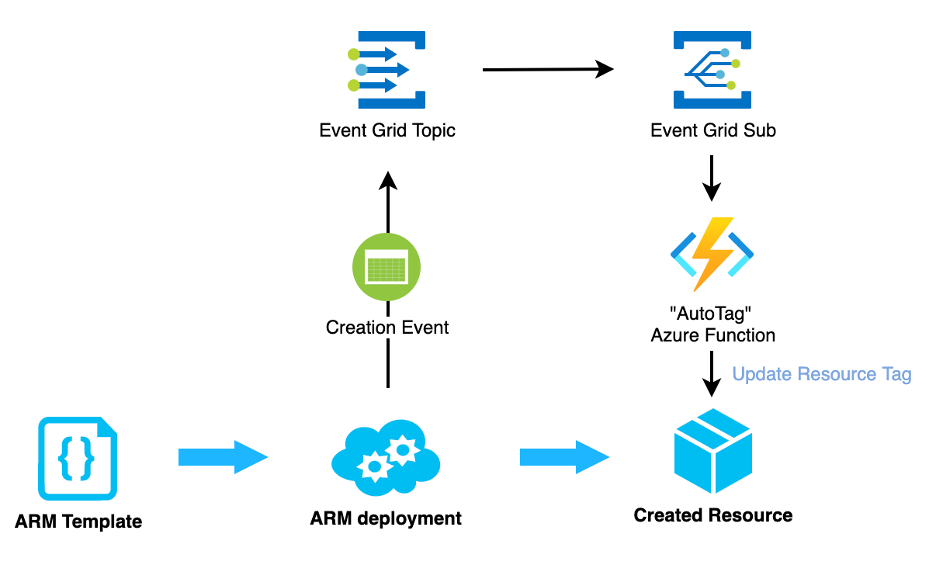
Each time an Azure resource is created, an event is emitted. This event triggers a centralized process that generates the expected tags and immediately applies them to the resource. Deployments can therefore stay focused on infrastructure, while tagging is handled in a consistent and systematic way.
A single diagram illustrates this processing chain:
The mechanism relies on three elements:
No logic is embedded in deployment templates.
Tagging is centralized and automated.
The function is triggered for each resource creation event.
Its role is to:
Function declaration
This code defines a function triggered by Event Grid:
[Function("AutoTag")]
public async Task Run([EventGridTrigger] string eventGridEvent)
{
    AzureResourceEvent resourceEvent =
        JsonConvert.DeserializeObject<AzureResourceEvent>(eventGridEvent);
    string resourceUri = resourceEvent.Data.ResourceUri;
    _logger.LogInformation("Tagging resource {ResourceUri}", resourceUri);
    string accessToken = await GetAccessTokenAsync();
    await ApplyTagsAsync(resourceUri, accessToken);
}
This method does only one thing: orchestrate the tagging process.
Retrieving the Azure token
The Function uses a managed identity to call the Azure API:
private async Task<string> GetAccessTokenAsync()
{
    TokenRequestContext context =
        new TokenRequestContext(
            new[] { "https://management.azure.com/.default" });
    AccessToken token = await _credential.GetTokenAsync(context);
    return token.Token;
}
Here, no secret or key is used: the managed identity simply needs the Contributor role (or equivalent) on the targeted scope.
Applying tags to the resource
This is where tags are defined and applied:
private async Task ApplyTagsAsync(string resourceUri, string accessToken)
{
    Dictionary<string, string> tags = new Dictionary<string, string>
    {
        { "application", "demo-app" },
        { "environment", "dev" },
        { "owner", "cloud-team" }
    };
    var payload = new
    {
        tags = tags
    };
    string url = $"https://management.azure.com{resourceUri}?api-version=2022-09-01";
    HttpRequestMessage request = new HttpRequestMessage(HttpMethod.Patch, url);
    request.Headers.Authorization = new AuthenticationHeaderValue("Bearer", accessToken);
    request.Content = new StringContent(
        JsonConvert.SerializeObject(payload),
        Encoding.UTF8,
         "application/json"
    );
    HttpResponseMessage response = await _httpClient.SendAsync(request);
    response.EnsureSuccessStatusCode();
}
At this stage, the code ensures that:
Event Grid data models
These classes are only used to read the event:
public class AzureResourceEvent
{
    public AzureResourceEventData Data { get; set; }
}
public class AzureResourceEventData
{
    public string ResourceUri { get; set; }
}
The System Topic receives events related to Azure resources:
{
  "type": "Microsoft.EventGrid/systemTopics",
  "apiVersion": "2022-06-15",
  "name": "resource-events",
  "location": "global",
  "properties": {
    "source": "/subscriptions/<subscription-id>",
    "topicType": "Microsoft.Resources.Subscriptions"
  }
}
Result: This topic listens to all resource creations within the subscription.
This subscription connects Event Grid to the function:
{
  "type": "Microsoft.EventGrid/systemTopics/eventSubscriptions",
  "apiVersion": "2022-06-15",
  "name": "resource-events/autotag-subscription",
  "properties": {
    "destination": {
      "endpointType": "AzureFunction",
      "properties": {
        "resourceId": "<function-app-resource-id>",
        "functionName": "AutoTag"
      }
    },
    "filter": {
      "includedEventTypes": [
        "Microsoft.Resources.ResourceWriteSuccess"
      ]
    }
  }
}
Result: every time a resource is successfully created or updated, the function is automatically triggered.
Create a simple Azure resource (for example, a storage account).
Then check the tags directly in the portal, or in your deployment pipeline using a simple script: az resource show --ids <resource-id> --query tags
The tags defined in the Function should appear automatically.
What this mechanism immediately provides
The mechanism presented in this tutorial is intentionally simple, but it can be enhanced without changing the architecture.
Several evolutions are possible depending on team needs:
These evolutions allow automatic tagging to progressively align with the maturity level of Azure governance, while maintaining a single, controlled entry point.