To undertake the operations described in this article, an Azure DevOps account with creation rights over pipelines is necessary.
The aim of this article is to show how it is possible, from a BizTalk Server Application project, to produce a build pipeline, using Azure DevOps, which can be used to automate artifact generation. These artifacts will be used to deploy the BizTalk application connected with the BizTalk Server Application project.
The BizTalk Server Application project chosen for this demonstration is described in this article.
To create a build pipeline, go to the Pipelines/Builds tab in the Azure DevOps project relative to the TFS project concerned (readers are reminded the Azure DevOps portal can be accessed here):
We are going to create a new pipeline by clicking on New Pipeline. Next, select the source to which the pipeline will be connected. A number of choices are possible. In our case, we are obviously going to select Team Foundation Version Control.
It should be noted that with other sources such as Azure Repos Git, it is possible to build our pipeline entirely in YAML. This is not yet possible for TFVC repositories.
After selecting the access path to the sources used, it is possible to choose a pipeline template. This makes it easier to set up build pipelines for commonly-occurring purposes. However, in our case, we will be selecting start with an Empty Job.
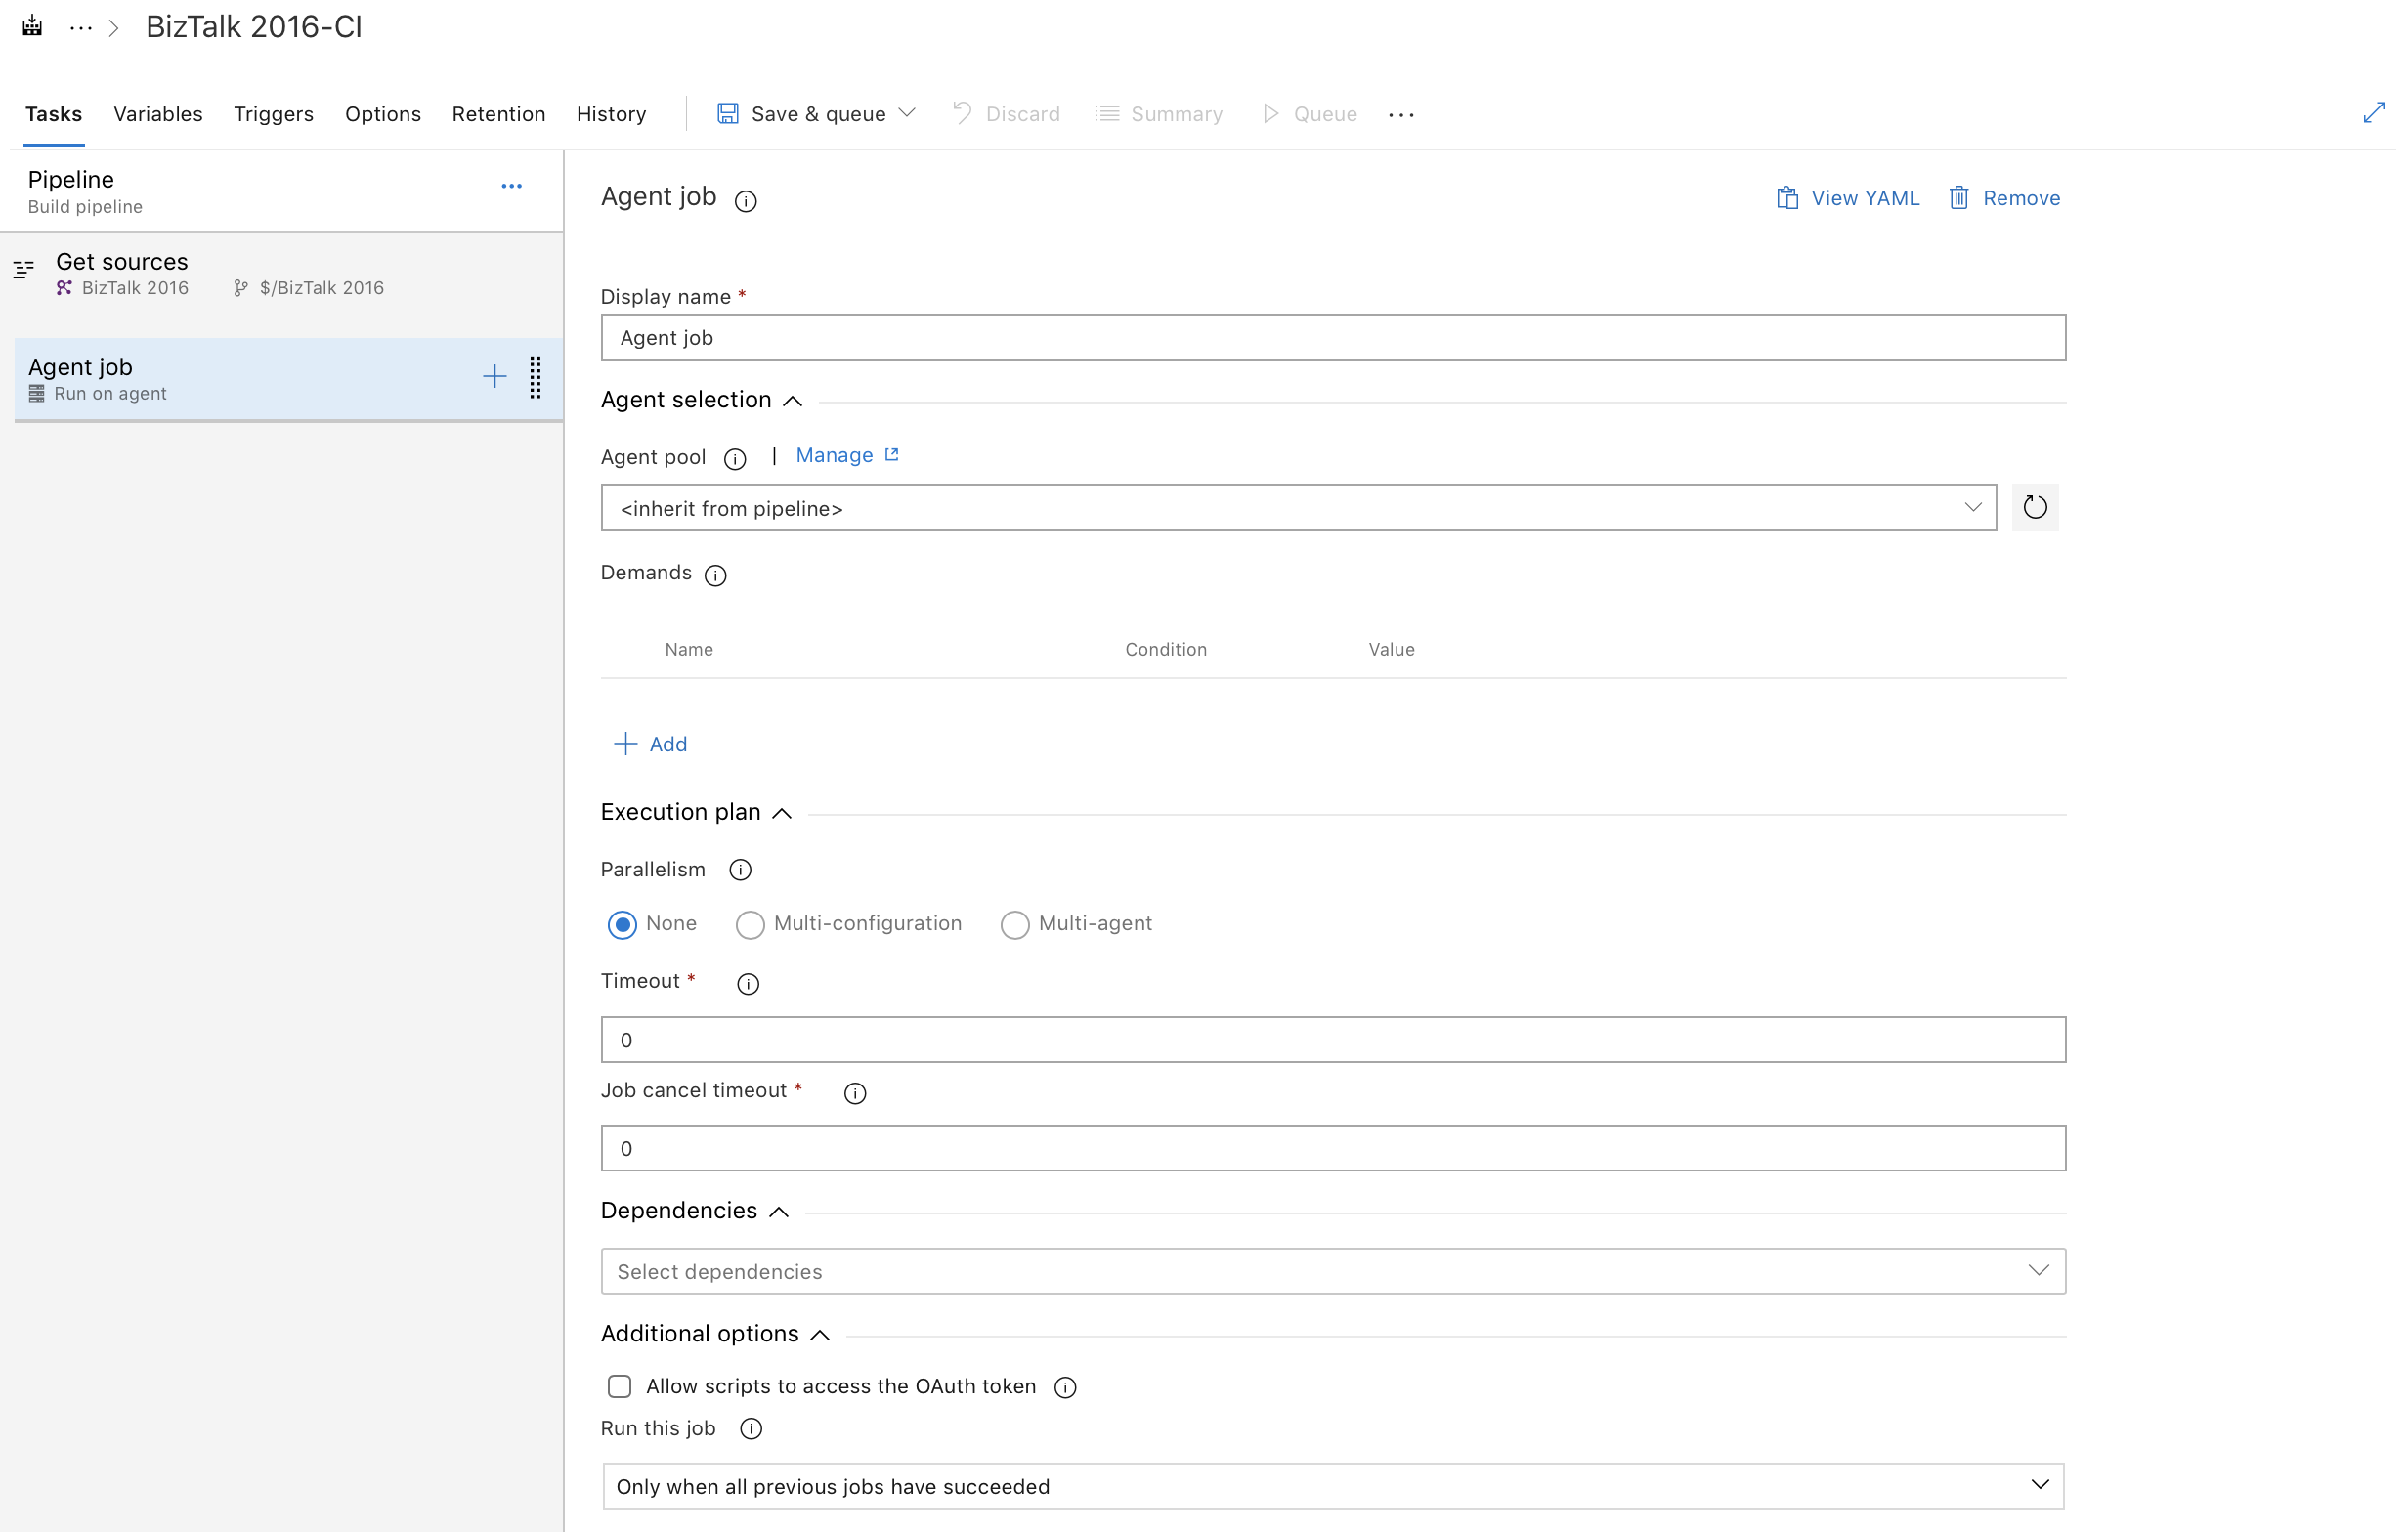
Once created, our pipeline contains the first source retrieval step that we have just configured. Next, we find a list of jobs. There is just one job by default.
The agent used to execute the pipeline must be indicated (Microsoft’s documentation on agents can be found here). Several types of agent exist, depending on the desired compilation environment (macOS, Ubuntu, etc.) and whether or not the agent is self-hosted (Hosted or On Premise). In our case, we will be choosing Hosted so that Azure takes charge of hosting our agent, and there is no need to worry about it. However, it is also possible to install an agent on a server. It will compile our sources on this server.
In addition, for each job, the agent used, the execution plan (parallelism and maximum execution times), and the jobs on which it will be dependent must all be configured. For simplicity’s sake, it is possible to inherit the agent from the pipeline. This will apply in our situation.

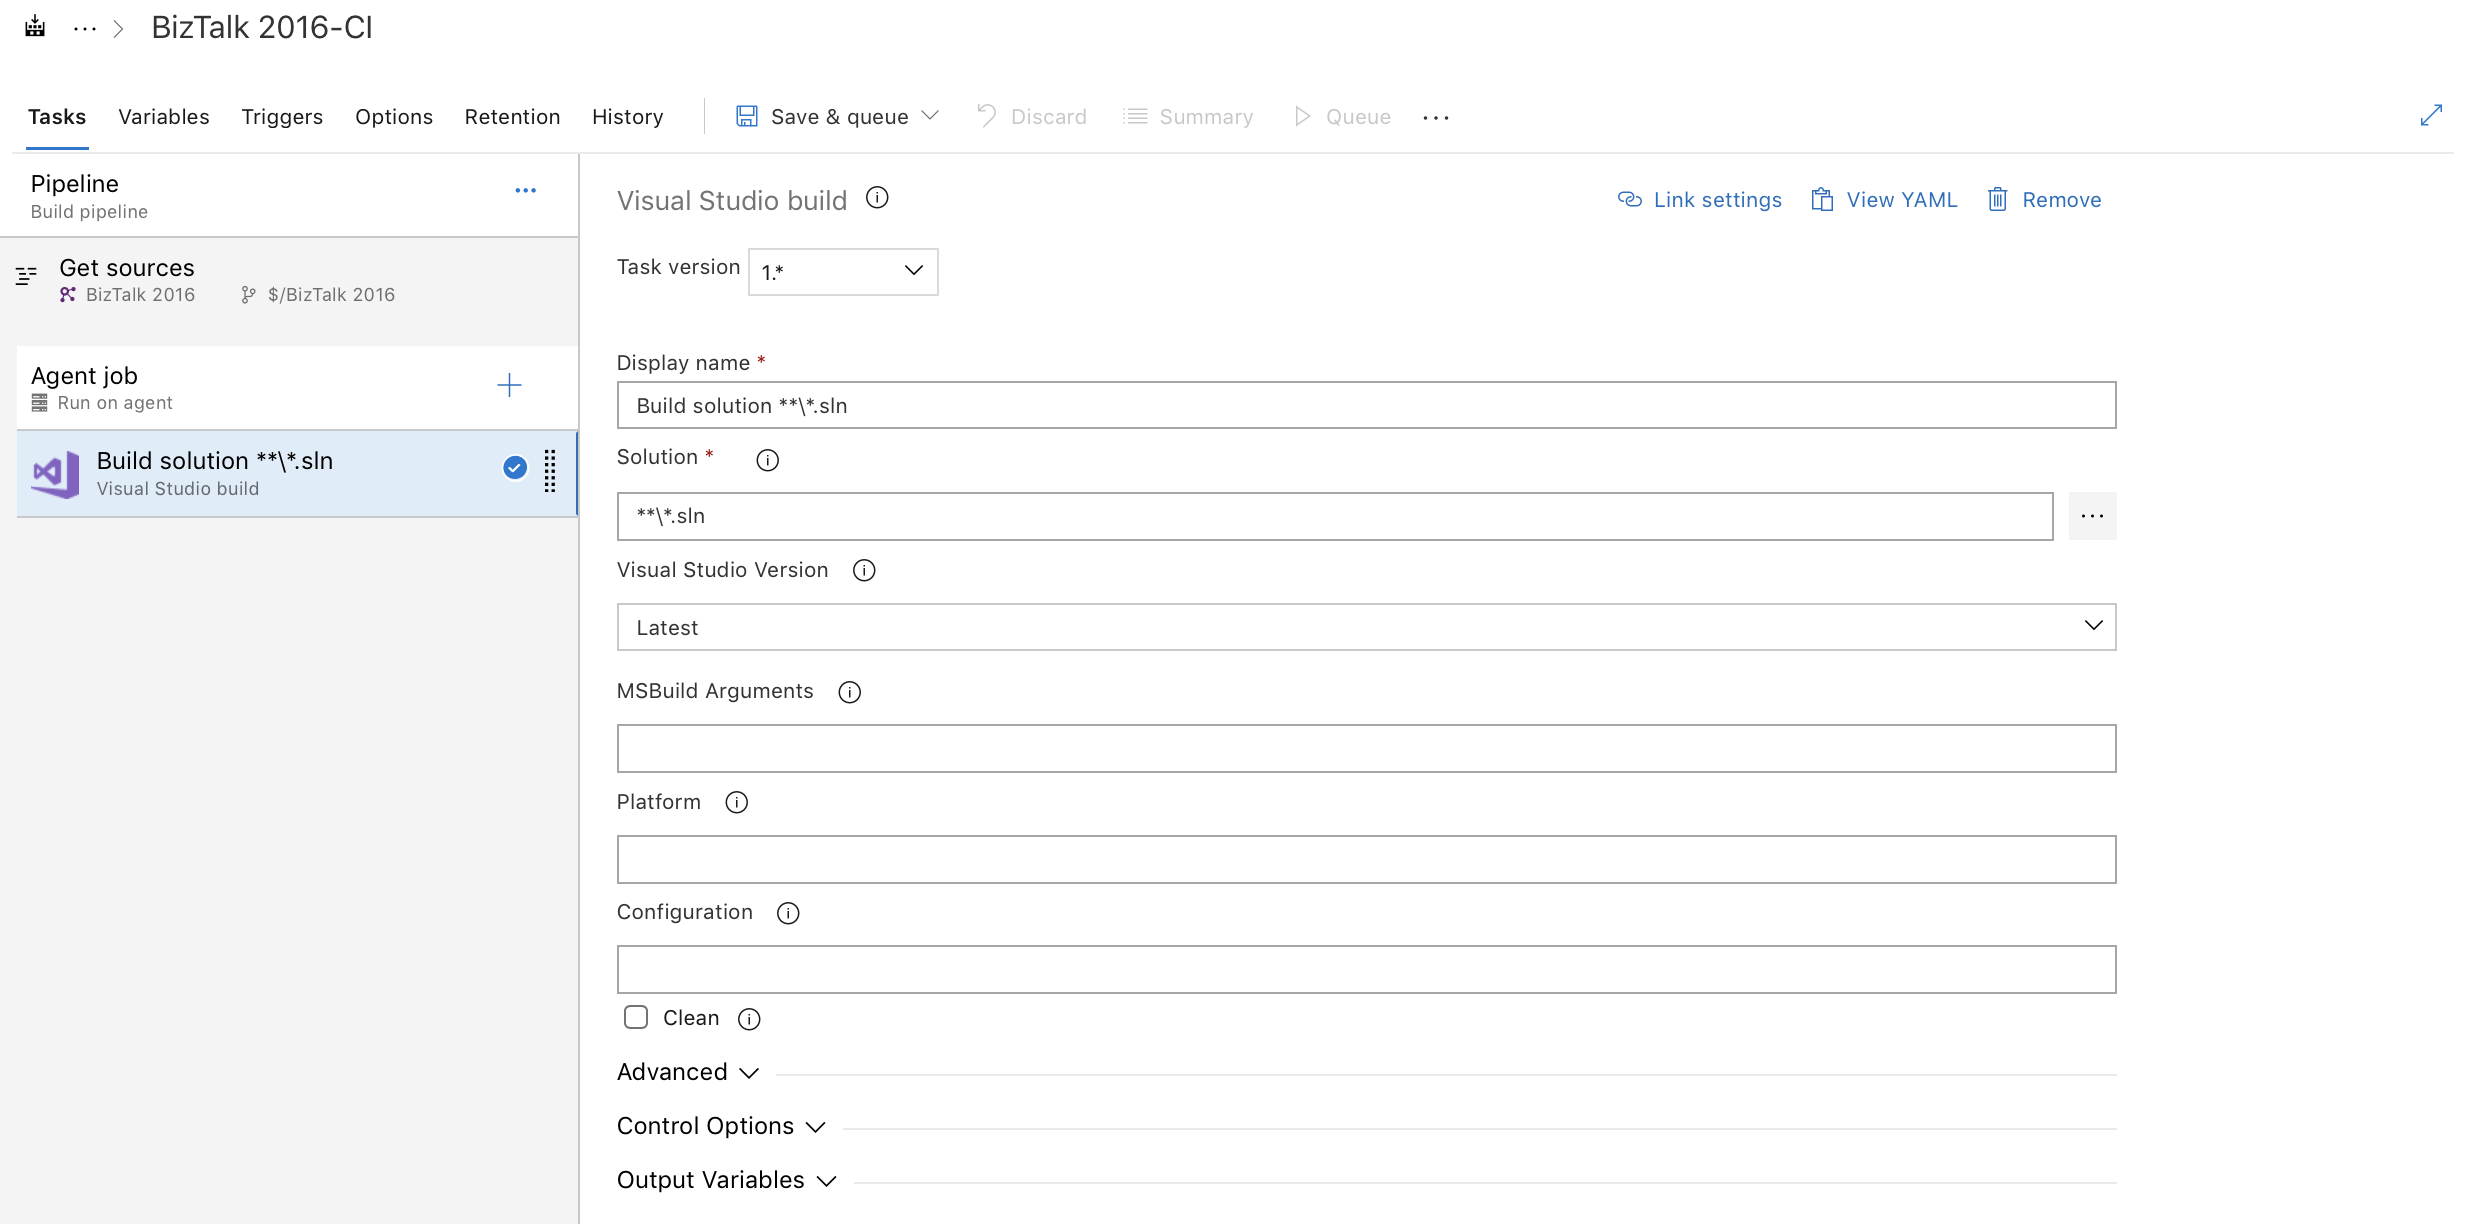
To generate the artifacts necessary to deploy our BizTalk application, we are going to create a new task in our job. By clicking on the + sign to the right of the job, and looking for Visual Studio build, the task can be added to the job.
Concerning task configuration, besides the name, it is important to define the Visual Studio solution to be compiled. A mask can be used to define more than one solution. The version of Visual Studio to be used must also be chosen, if it is not the most recent. To finish, compilation is entirely configurable (arguments, build configuration, parallelism, retrieval of NuGet Packages, etc.).

In our case, we will choose Visual Studio 2015 and a **\*.sln file mask to include all the solutions from the root defined during pipeline creation.
This task can be used to compile the desired sources. Unfortunately, the result of this compilation cannot be used in Azure DevOps for a deployment. An additional task has to be added to achieve this, namely: Publish build artifact.
This task will make it possible to construct a ‘build’ artifact. This means a container holding the result of our compilation, which will very probably be made available to release pipelines for their deployment.
At this stage, the name of the task and artifact must be given. But importantly, the pathname pointing to the result of our compilation and the artifact’s location must be defined. This location can be Azure Pipelines (and therefore done by Azure DevOps) or a shared file to which the agent has access. We will choose Azure Pipelines for greater simplicity.
After being saved, our pipeline is ready to use.
It is a common need to give compilations variables. Azure DevOps offers a Variables tab within the pipeline.
It is consequently possible to declare variables, then use them throughout the various pipeline tasks, referring to them by name. It is also possible to add password variables (by clicking on the padlock shown to the right of the value). This type of variable can be modified subsequently; however, the value remains undisclosed.
The pipeline we have just built can be triggered manually, but its execution can also be automated. To achieve this, the Triggers tab is used to define whether to activate the Continuous integration option and run the pipeline for every synchronization of sources in the central repository. It is possible, for TFVC, to enable the Gated check-in option, which forces a contributor to successfully compile code before triggering.
The Scheduled and Build completion options (for triggering dependent on another build pipeline) are also used a lot.

Selecting your pipeline after one or more executions makes the list of different build instances available.
Click on it, and Azure DevOps shows all the jobs executed for this instance. Each job can be clicked, to inspect the relevant logs.
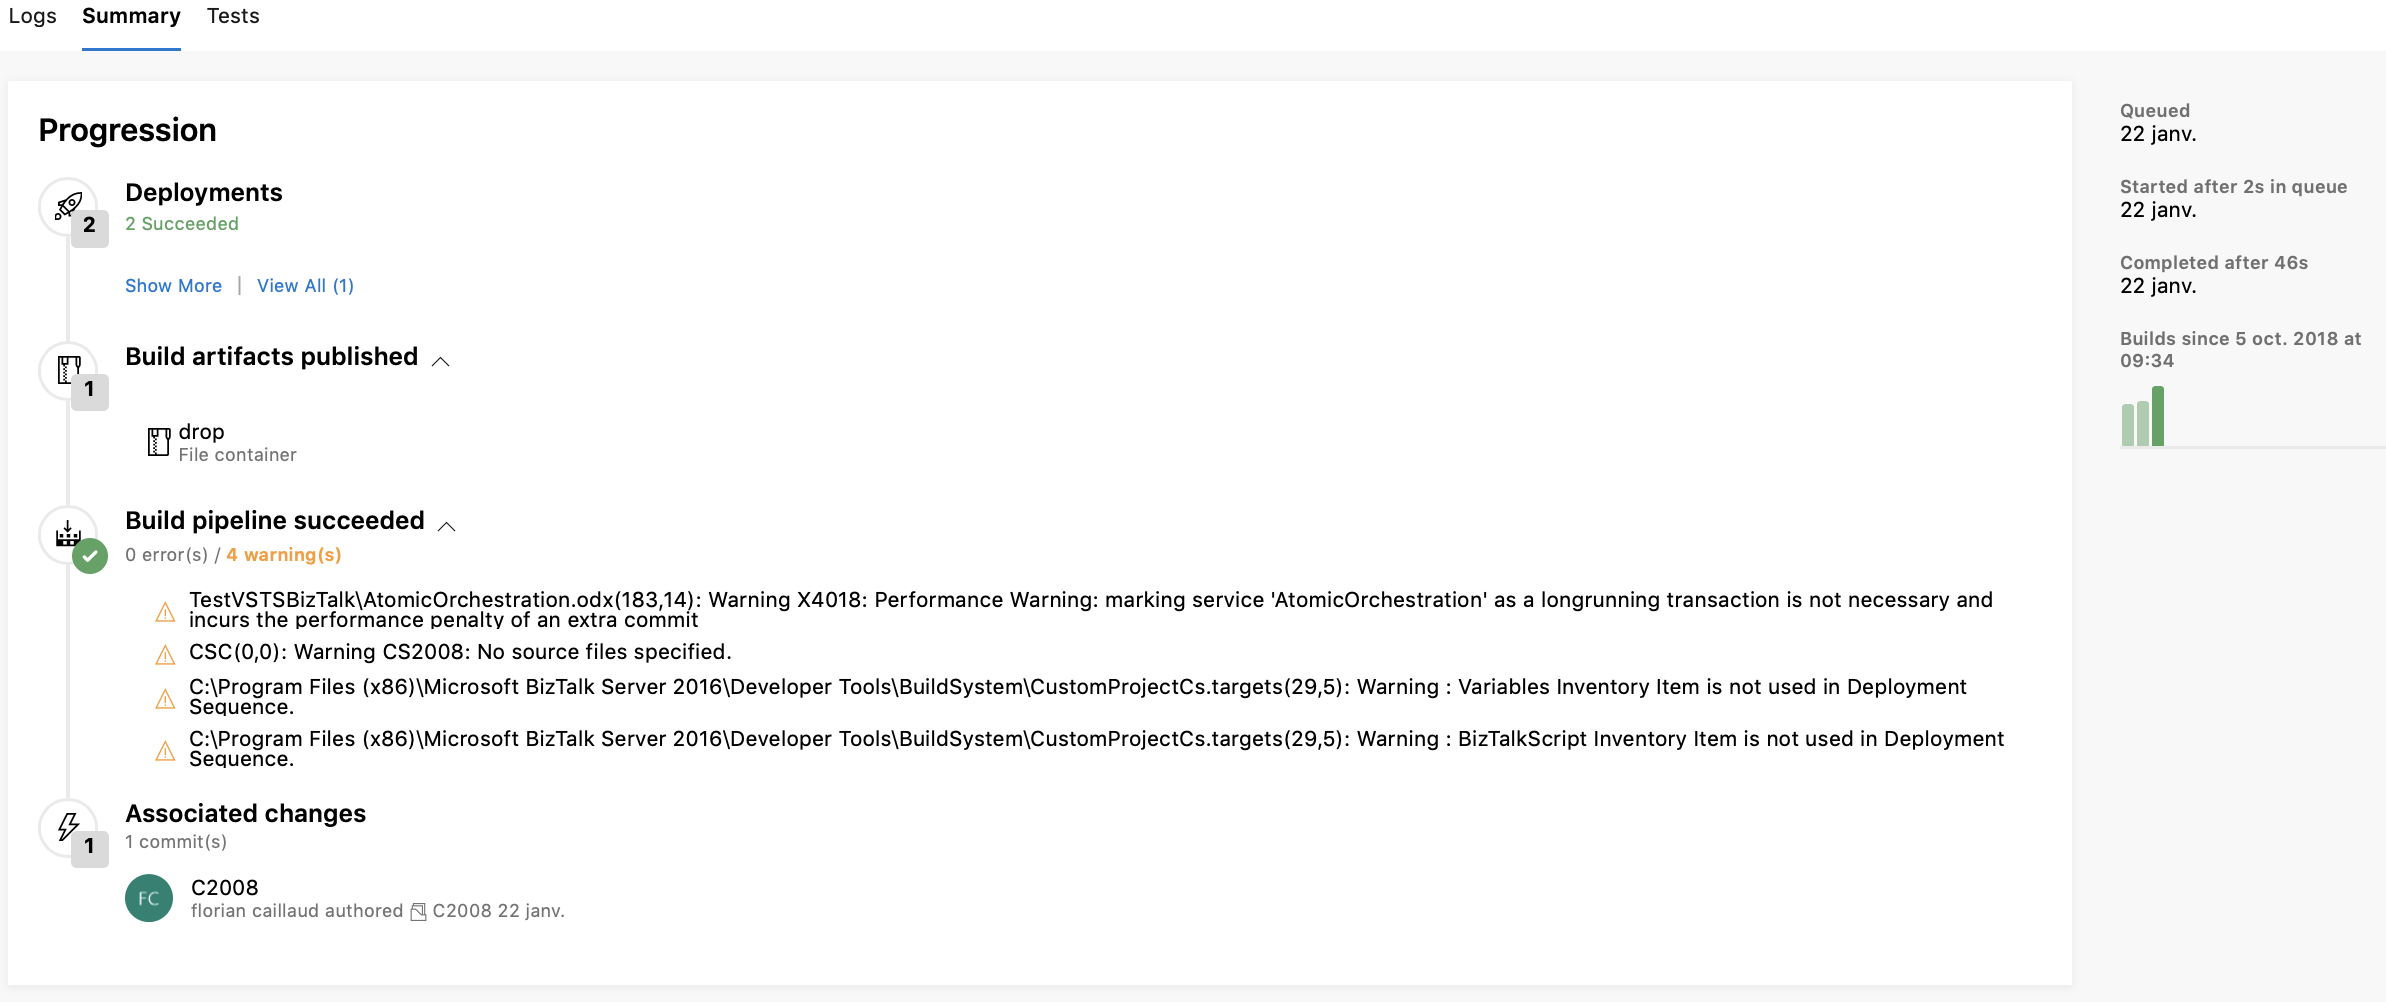
The Summary tab is a summary of the instance, with the associated changesets, any warnings or errors generated at runtime, the artifacts created (and downloadable) and the number of successful releases using those artifacts.
